ComfyUI上使用SDXL1.0官方工作流实操使用 零基础讲解节点式生成的Ai绘画工具comfyui,节点模块讲解
1.ComfyUI是什么?
ComfyUI 是一个节点式的stable diffusion AI绘画工具,ComfyUI通过将stable diffusion的流程拆分成节点,实现了更加自由的工作流定制。你如果用过houdini、blender、ue等节点式软件,或许你能更轻松的上手开始使用。
ComfyUI适用于任何想要使用 SD 制作复杂工作流程或想要了解更多 SD 工作原理的人。该界面紧密遵循 SD 的工作原理,并且代码应该比其他 SD UI 更容易理解。
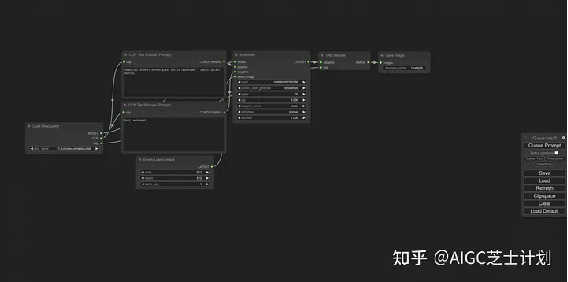
ComfyUI的基础文生图界面
2.使用ComfyUI有哪些好处?
因为comfyui更符合stable
diffusion的工作原理,生成图片时的速度相较于webui有较大的提升,根据我的测试生成大图片的时候不会爆显存。
comfyui通过将stable diffusion的流程拆分成模块,实现了更加精准的工作流定制和完善的可复现性。在你对comfyui模块节点足够了解之后,可以很容易的定制你自己的工作流。
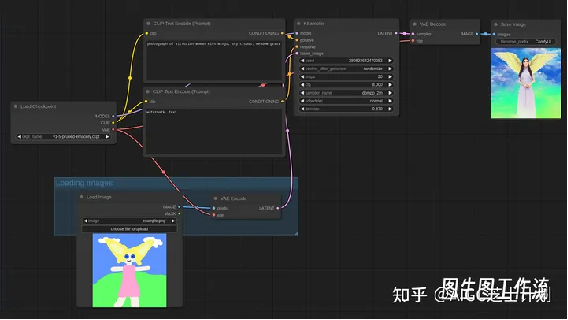
图生图工作流
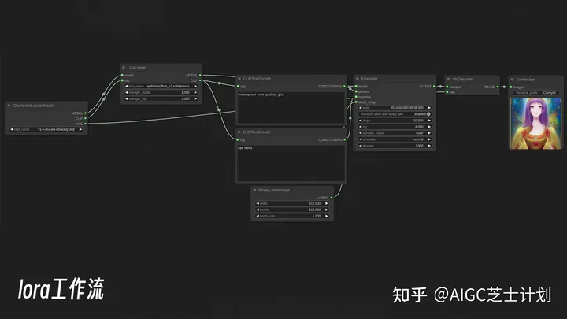
lora工作流
在你进行复杂长线的大型工作中,可以搭建特殊的工作流程,排队运行任务,不再需要坐在电脑前等待图片渲染完成,再人工重复的进行下一步。
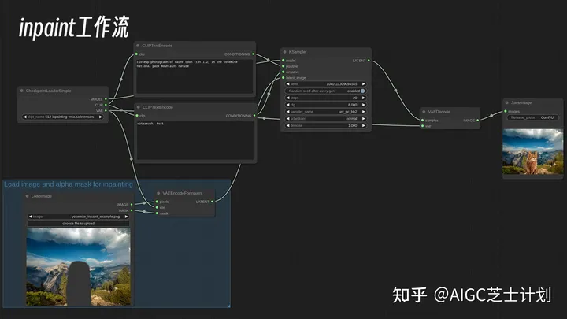
inpaunt工作流
并且comfyui轻量化的特点,使用SDXL模型还能有着更低的显存要求和更快的加载速度,最低支持4G显存的显卡使用。可以说不论是自由度、专业性还是易用性,comfyui在使用SDXL模型上的优势开始越来越明显。
3.如何下载ComfyUI呢?
官方github链接:
https://github.com/comfyanonymous/ComfyUIgithub.com/comfyanonymous/ComfyUI
如果不能打开github的,我也整理好了网盘链接:
ComfyUI下载链接-百度云: 链接:https://pan.baidu.com/s/1loSMJ5bwHF_8iLG93CNRXg?pwd=f2kd 提取码:f2kd
ComfyUI下载链接-夸克网盘: 链接:https://pan.quark.cn/s/5aca417359cd 提取码:ZcST
3.1.ComfyUI下载安装:
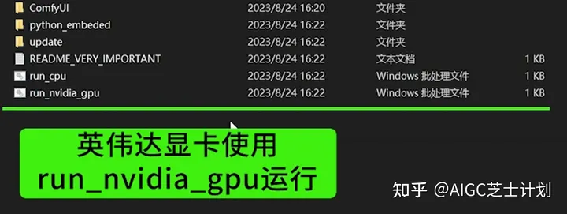
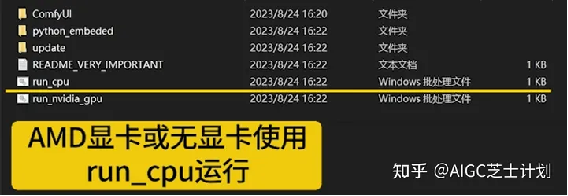
首先从官方的github连接上找到最新的安装包,直接下载下来,解压即可使用。

解压完成后如果你是英伟达显卡点击run_nvidia_gpu启动,如果你是AMD显卡或者没有显卡就只能点击run_cpu启动了。
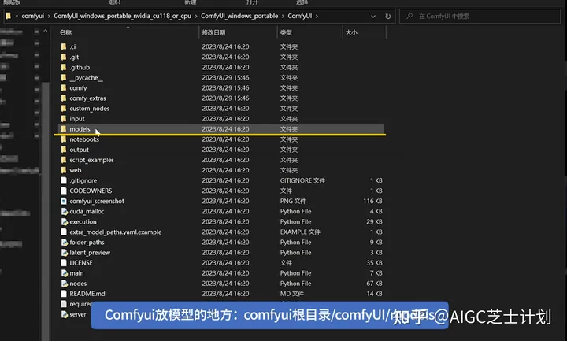
3.2.配置模型
ComfyUI安装包中不包括模型,所以需要将模型放置到ComfyUI对应目录中:
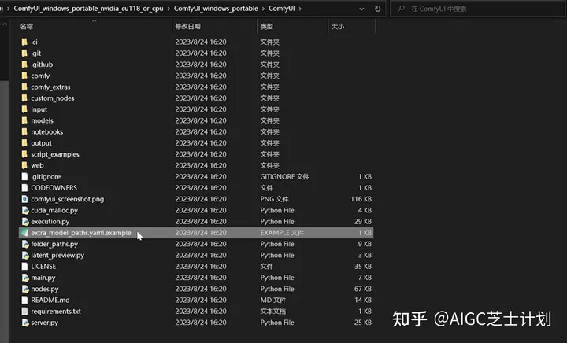
如果你使用过webui,那你已经有一套自己的模型了,如果复制过来就会很浪费硬盘空间,所以comfyUI的作者提供了将webui中存放的模型链接进来的功能。
在webUI目录中找到这个叫做在extra_model_paths.yaml的文件,将后缀名example去掉,然后右键选择使用记事本打开。
在base_path这行复制上你的webui根目录地址。
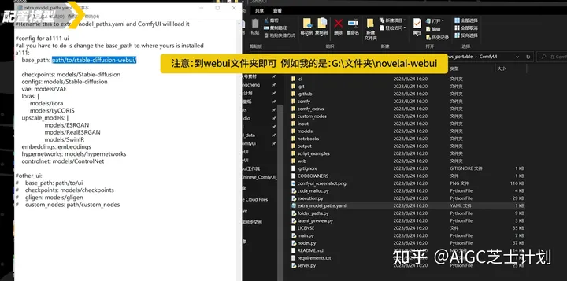
然后保存,现在再启动confyui就可以直接使用了,打开后你应该能在选择模型的时候,看到你所有的模型了。
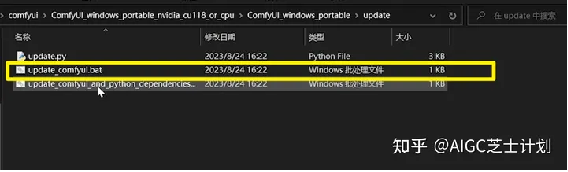
3.3.ComfyUI后续更新
如果后面需要更新ComfyUI,可以直接使用ComfyUI中的update脚本即可:
4.ComfyUI怎么使用
4.1.基础模块讲解:
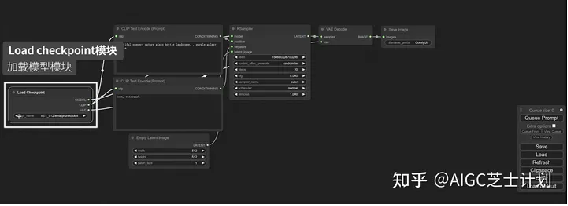
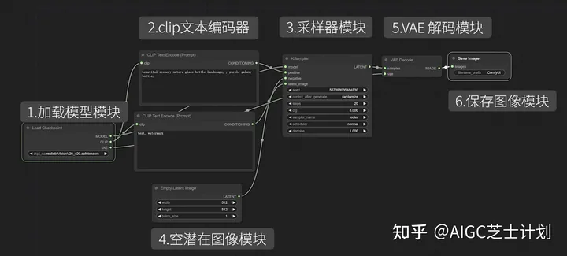
打开后这就是一个最基本的文生图的工作流程。
首先可以看到有一个load checkpoint模块,这个模块就是在web UI中选择模型的地方,点开可以选择你的主模型,其中clip节点分别指向了正向描述词和负向描述词模块。
clip是什么意思呢?
clip是一种由openai开发的神经网络模型,它可以将自然语言和视觉信息进行联合训练,从而实现图像与文本之间的跨模态理解。clip可以用于各种视觉和语言任务,例如视觉问答、图像分类、图像生成、文本分类等。
openai clip官网:
CLIP: Connecting
text and imagesopenai.com/research/clip
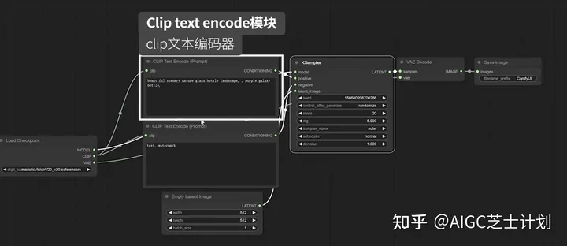
Clip text encode模块,也就是写正负向提示词的模块,他们分别链接到ksampler模块的positive和negative节点。
ksampler模块即是webui中的采样器,可以调整采样方法、CFG步数等参数。
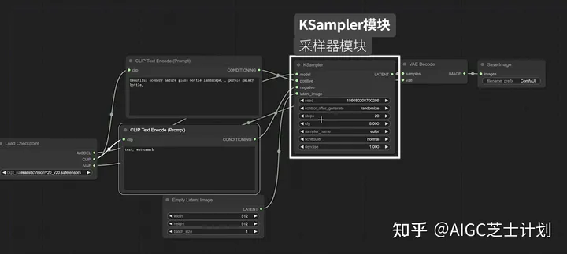
ksampler模块上的model节点链接的即是上面提到的load checkpoint模块,

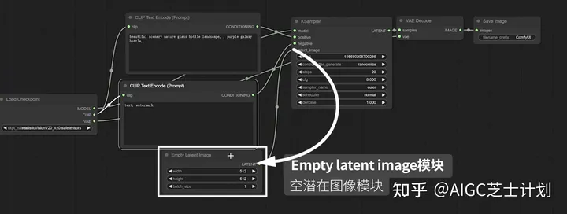
latent_image节点上面链接了一个empty latent
image模块,可以设置图像的宽高和生成图像数量。
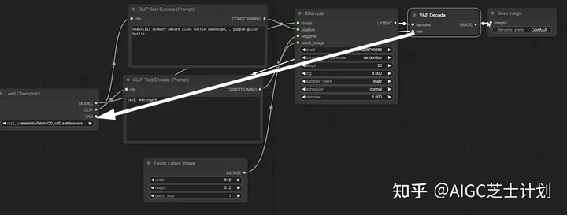
最后可以看到有一个VAE Decode模块,前面的ksampler采样器模块产生的其实是一个潜空间的图像,经过VAE Decode模块解码后还原到像素空间,也就是我们最终生成的图像。

注意,VAE Decode模块中samples节点链接的是采样器节点,VAE节点链接的是load checkpoint模块的vae节点。
最后别忘了还有一个save image模块,用来展示和保存图像。
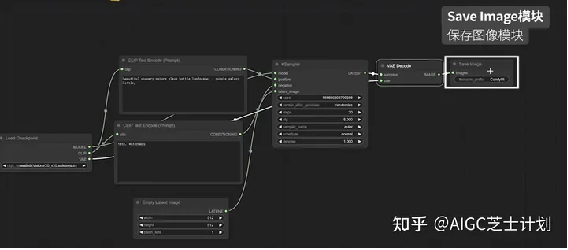
这几个模块就构成了文生图的基础模块。
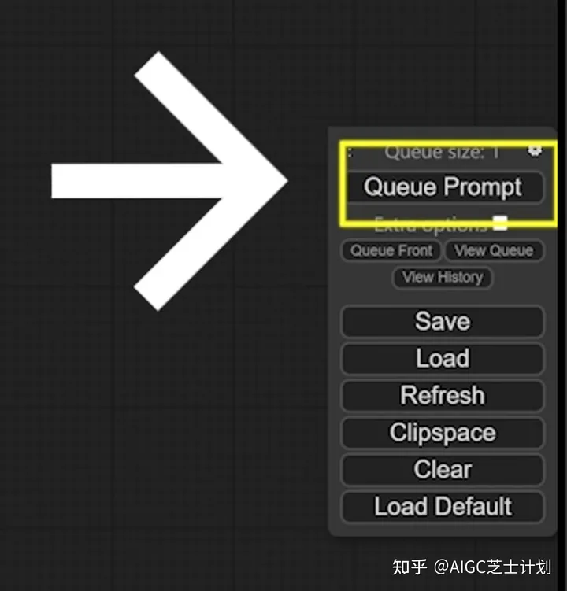
选择模型,写好提示词再调整参数之后,就可以点击queue prompt进行生成图片了。点击save保存当前的工作流,点击load可以导入他人整理好的工作流。
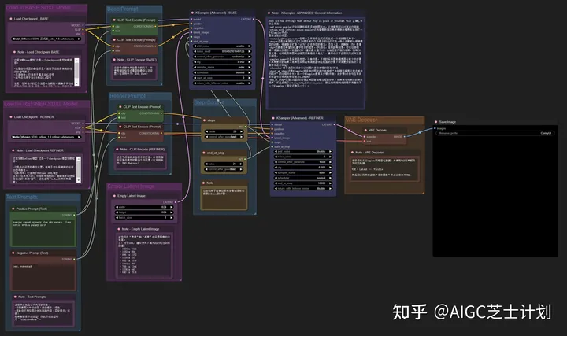
4.2.官方的SDXL工作流的使用介绍
我们导入官方SDXL的标准流程,我在每个板块在旁边添加了中文备注,解释了每个板块的用途。接下来我演示一下如何使用SDXL模型在comfyui上的工作流
在最左侧的这两个load checkpoint模块分别添加base模型和refiner模型。
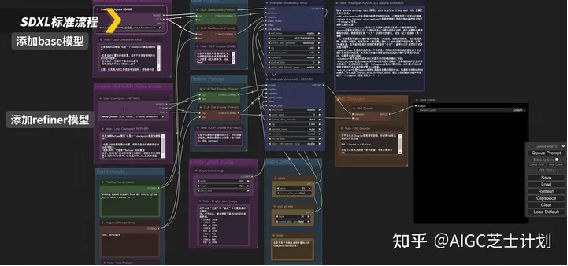
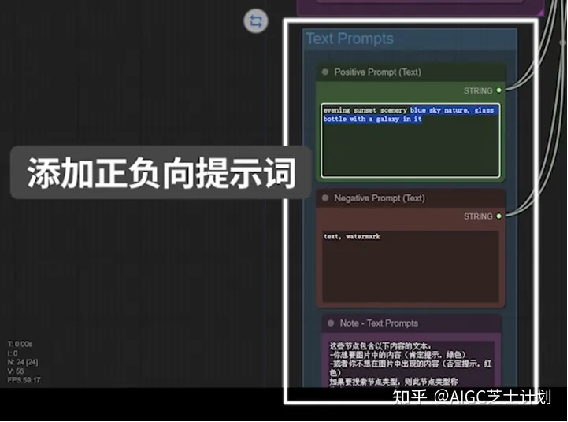
下方text prompts模块添加提示词,绿色添加正向提示词,红色添加负向提示词。
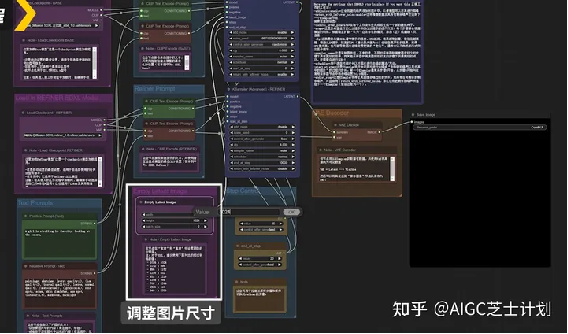
在empty latent image模块进行设置图片的宽高和生成数量。SDXL模型的图像最好使用1024乘1024分辨率及以上的数值,可以获得更好的效果。
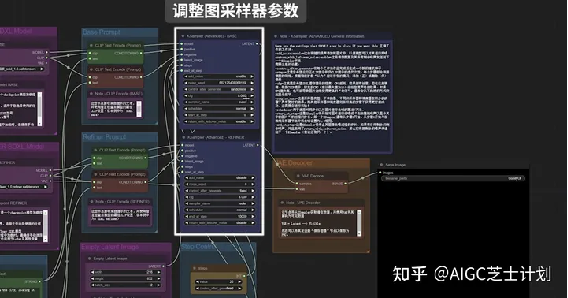
这里有两个ksampler采样器分别对应base模型和refiner模型,可以分别修改采样器参数,调整采样方法、CFG步数等参数。
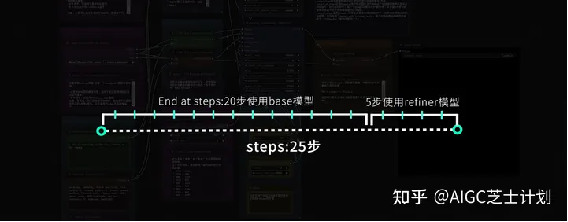
在这里有需要注意的一点,在step control模块里,steps模块控制总步数,end at step模块的步数是指结束base模型生成的步数,然后剩余步数开始用refiner模型进行生成。

所以这里的意思是,图像一共使用25步生成,前20步使用base模型,后5步使用refiner模型。一般refiner模型的步数是base模型步数的20%左右即可。
之后就可以点击queue prompt进行生成图片了。整个流程和webui差别不大。 如果对SDXL模型不是很了解的小伙伴可以去看我上一篇文章,我将SDXL模型的优势和推荐使用的参数都详细讲解了。
AIGC芝士计划:SDXL1.0大模型的发布能给Stable Diffusion带来全新的使用体验吗?7 赞同 · 2 评论文章
5.更多工作流
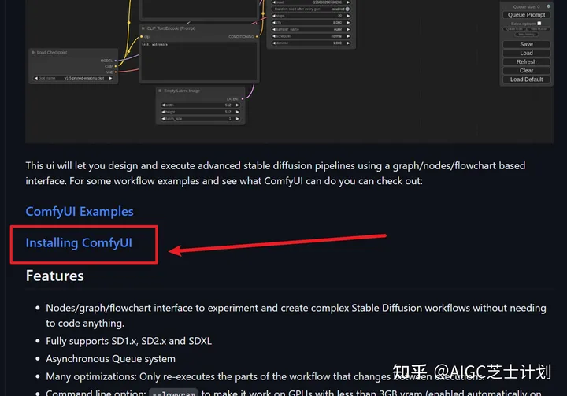
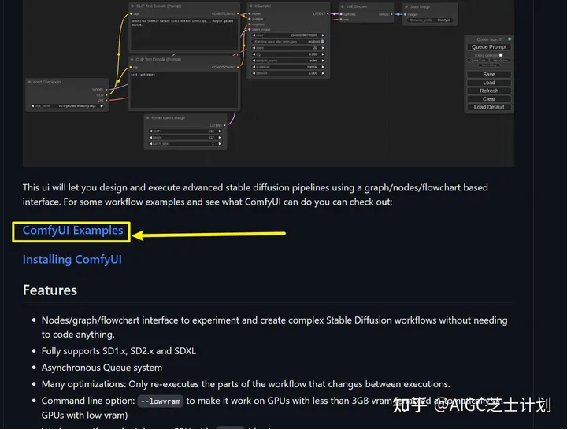
如果你想要更多的流程,可以打开comfyui的gihub地址,找到comfyui examples点进去。
或者直接点击网址:
https://comfyanonymous.github.io/ComfyUI_examples/comfyanonymous.github.io/ComfyUI_examples/
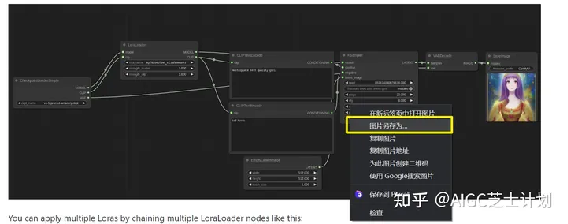
这里有很多常用的工作流程,这些官方都已经做好了,我们只需要保存这张图,然后拖入到comfyui界面里,就会自动识别到这个工作流程直接更新。
当然你也可参考官方的链接节点方式对你的工作流进行调整。调整好工作流一定记得点save保存当前的工作流,方便之后的导入使用。
出自:https://zhuanlan.zhihu.com/p/653775025