前言
今天我要做个controlnet 使用方法总结,如果你们对所有controlnet用法,可能了解但是有点模糊,希望能对你们有用。
一、SD controlnet
我统一下其他参数,仅切换controlnet模型,为你演示效果
正向提示词:(只是一些人物基础提示词为了方便省事,实际场景请根据图片反推提示词)
best quality,masterpiece,4k,1girl,solo,long hair,dress,jewelry,choker,brown hair,realistic,necklace,brown eyes,black dress,lips,<lora:tianfeng_cutegirls4:0.8>,
负向提示词:
ng_deepnegative_v1_75t,(badhandv4:1.2),(worst quality:2),(low quality:2),(normal quality:2),lowres,bad anatomy,bad hands,((monochrome)),((grayscale)) watermark,moles,large breast,big breast,sunshine,bright,
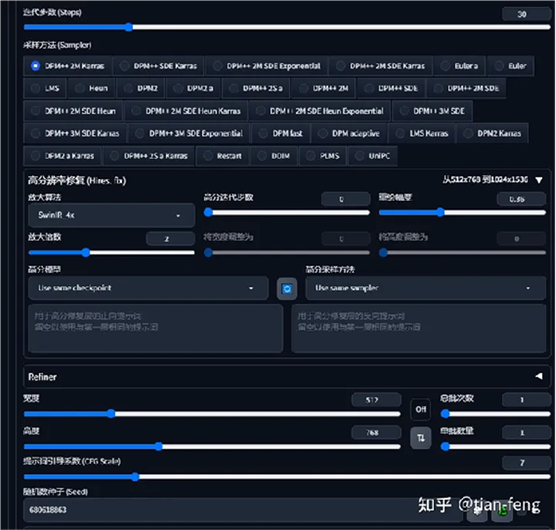
中间参数
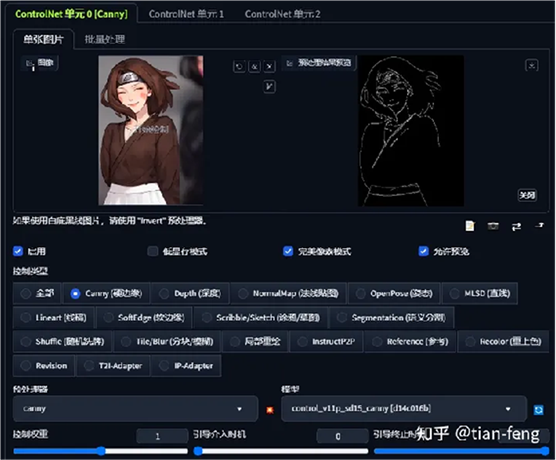
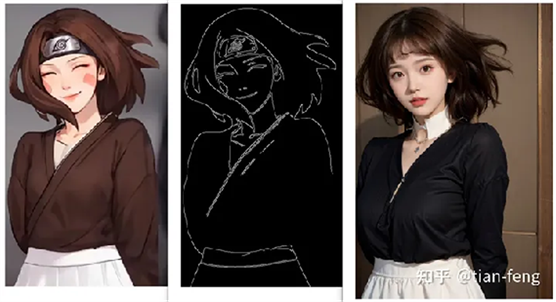
1.Canny
可以根据你提供的图片经过预处理器成为线稿,然后经过canny
controlnet模型控制图像扩散,可以调节权重和引导时机控制线稿的比重,适用场景偏需要提取人物,汽车,动物等线稿进行重绘
2.depth
深度controlnet主要用于凸显图像的前景背景和空间关系,前景的比重大,背景浅(提示词加上空间等),在使用场景适用于对空间纵深有需求
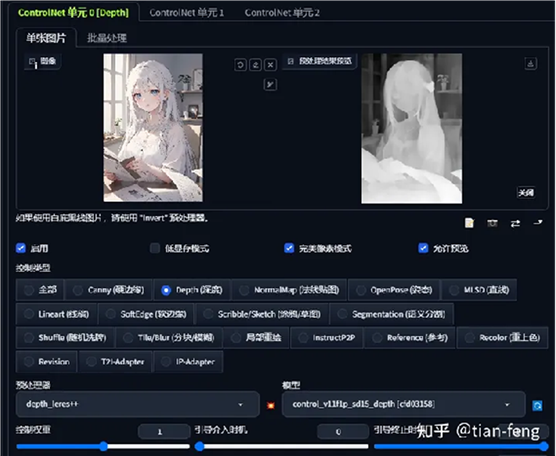
深度有好几种预处理器,你可以都尝试下,它们区别总结为对前景背景比重不同,有点凸显主体人物,背景则比重较小,有的则是主体背景适当均衡
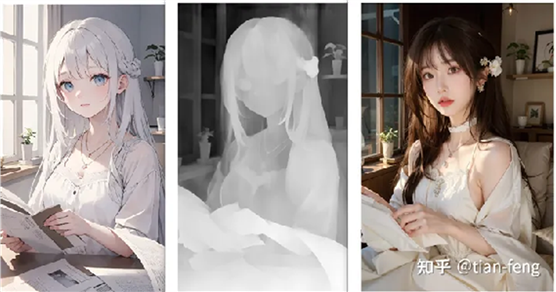
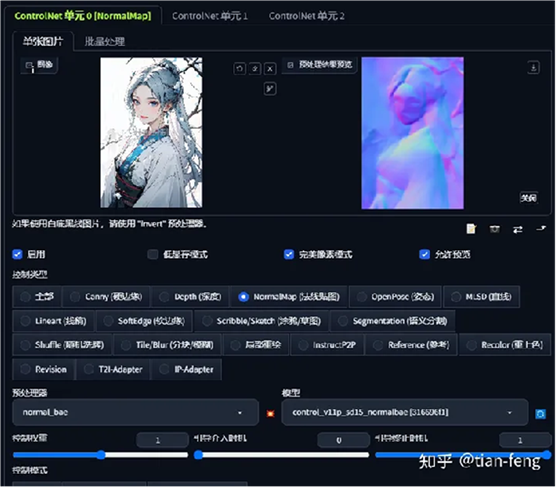
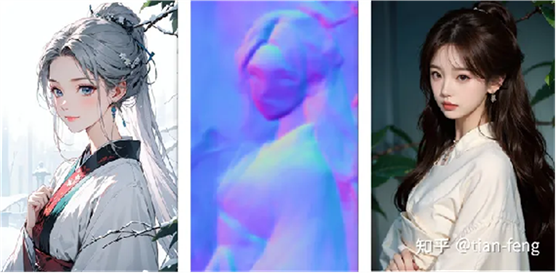
3.Normalmap
法线贴图一般应用于3d雕塑,带来3d深度雕塑的信息,使用场景一般为3d雕塑,我的举例图片可能不太恰当,你大概知道干什么的就行
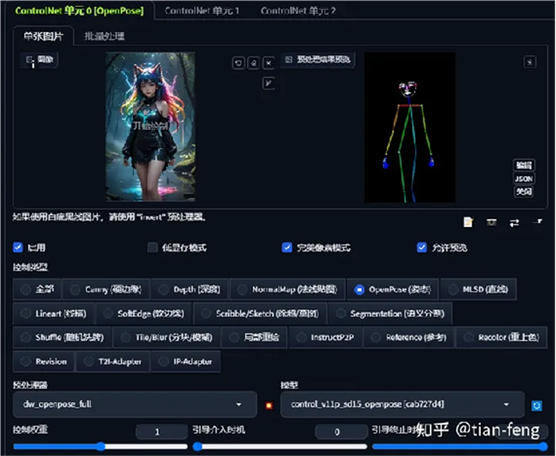
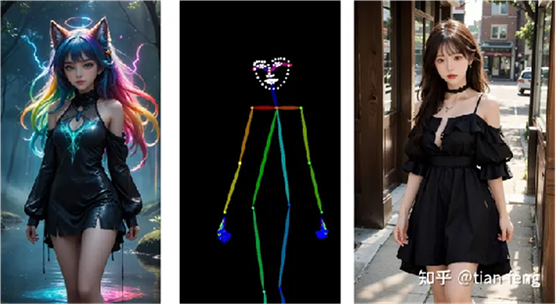
4.openpose
根据提供的图片提取姿态信息,控制想要生成风格的姿态图片,推荐dw_openpose
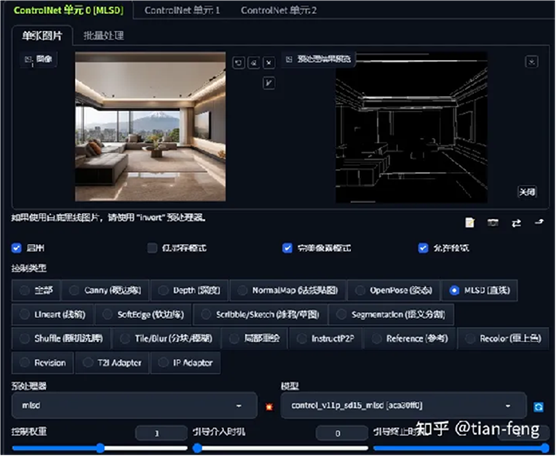
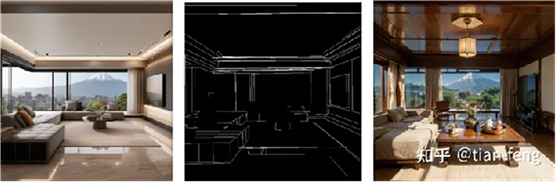
5.MLSD
一直只能识别直线,用于室内设计提取线稿,然后重绘,一键装修
提示词:
qingshe,living room,HDR,UHD,8K,best quality,realistic,masterpiece,Highly detailed,light,lamp,Fuji_Mountain out of window,
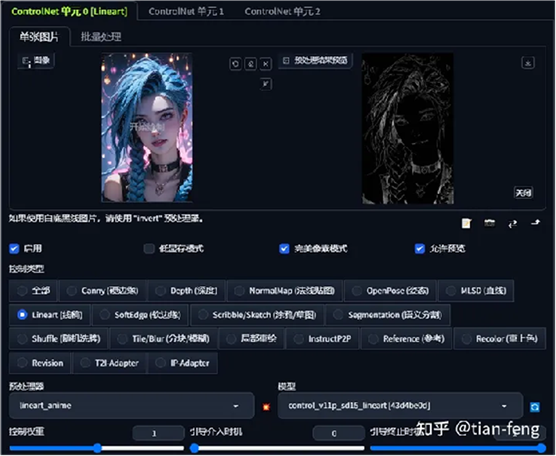
6.Lineart
Lineart预处理器有分别针对写实,动漫,可以根据自己需求选择预处理器,效果来说比canny好
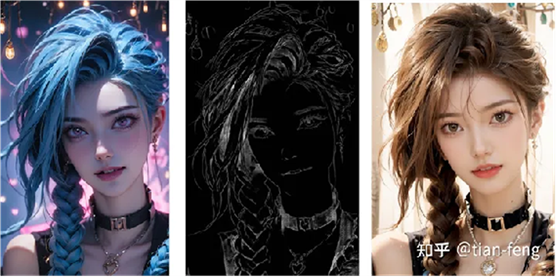
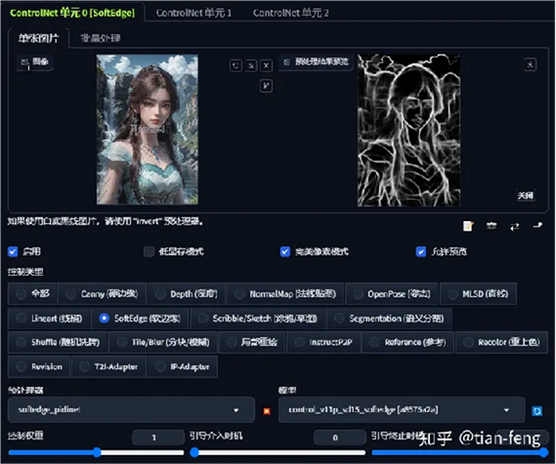
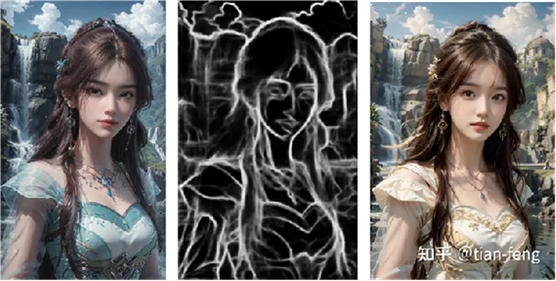
7.softedge
软边缘检测与canny和lineart不同,采用一种更加柔和符合真实场景线条信息,与原图也更加吻合
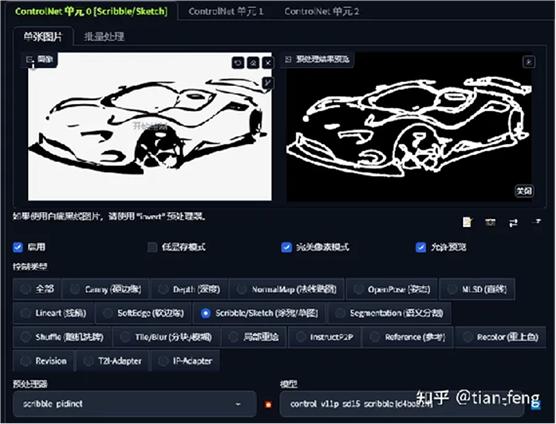
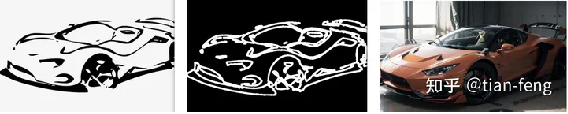
8.scribble
你还在为画画太丑而烦恼吗,上传简简单单的涂鸦手绘,即可生成一张炫酷图片,例如上传一张丑到爆炸的跑车涂鸦
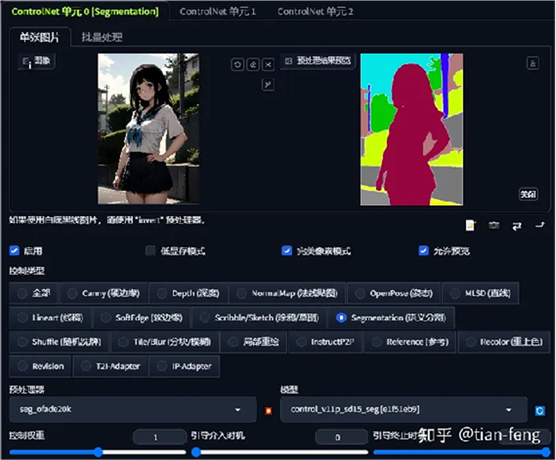
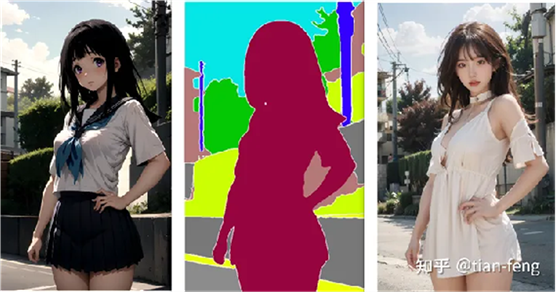
9.segmentation
将图片存在的物体进行分割出来,这样可以保证重绘物体还原性高,同时还可以在预处理出来的图片上进行添加色块,segmentation有一个物体与色块对应表,例如画一个桌子,涂上对应的颜色,经过controlnet绘制,可以更加精准生成一张桌子
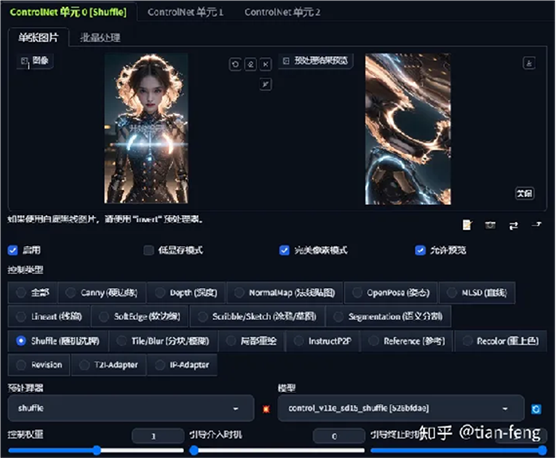
10.shuffle
风格融合,可以上传一张如水墨,油画,科技画风图片,经过预处理器通过controlnet会与原模型风格进行融合,生成一张融合风格的图片
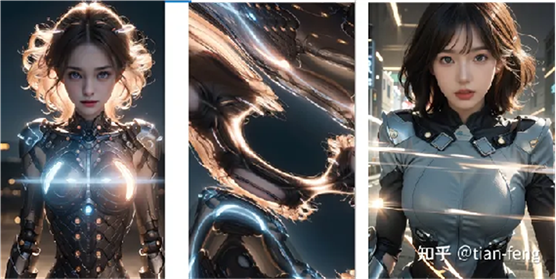
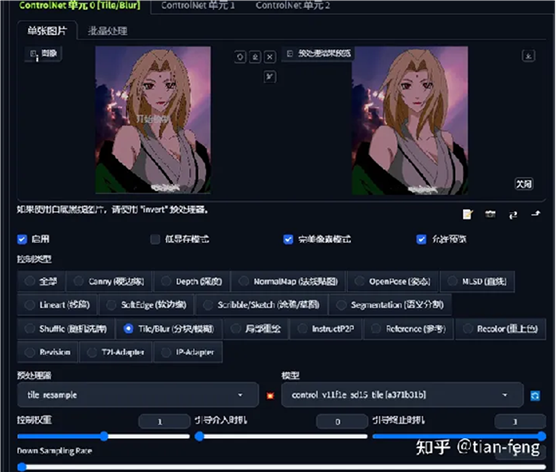
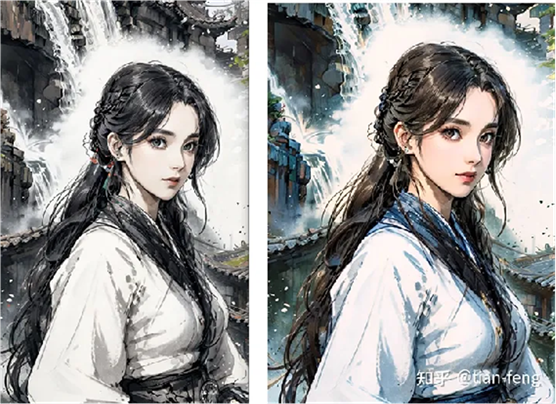
11.Tile
tile用法非常多,就使用而言,目前是我使用感觉最强的一个controlnet模型,特别是在还原图片风格上,因为是分块重采样,基本完美复刻,同时高清修复效果细节也远超普通放大算法

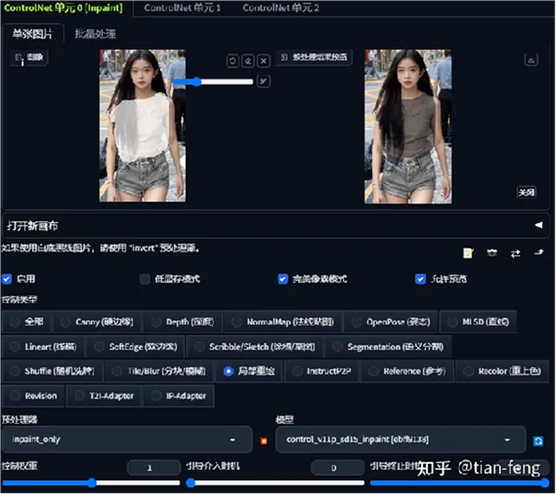
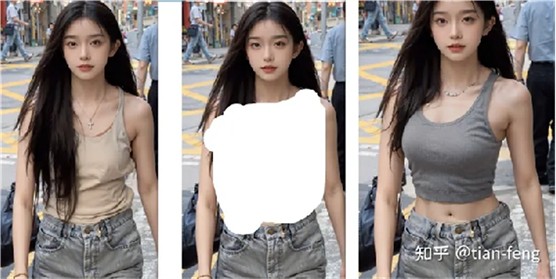
12.inpaint(局部重绘)
类似图生图局部重绘,用画笔在原图涂上需要重绘的部分,然后加上对应提示词,例如换装
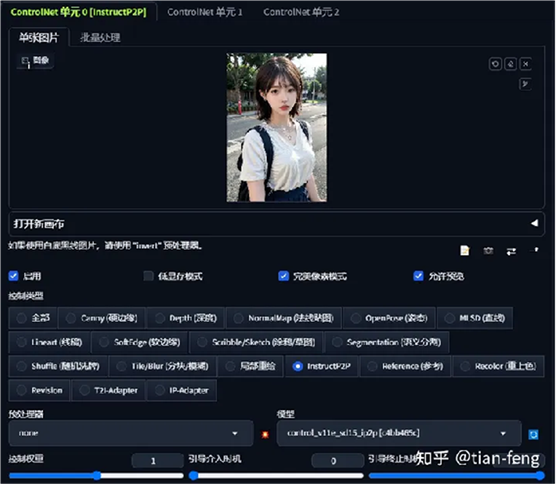
13.instructP2P
pix2pix主要用于风格迁移,例如天气转换

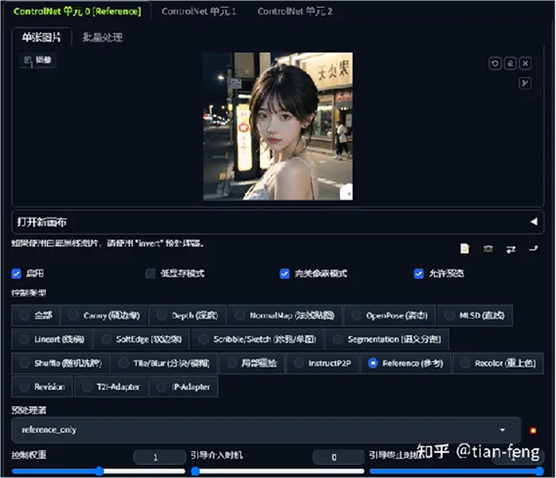
14.reference only
可以根据你上传的图片,添加提示词重新生成一张相同风格的图片,如女孩侧身,提示词新加上,身体正对观众

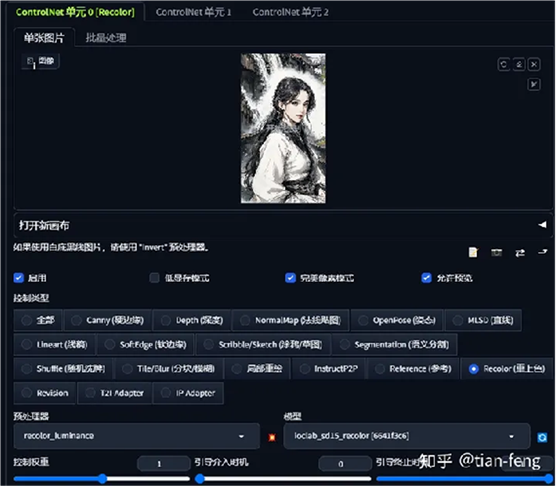
15.Recolor
主要用于一些老旧照片的上色,或者黑白图,都可以
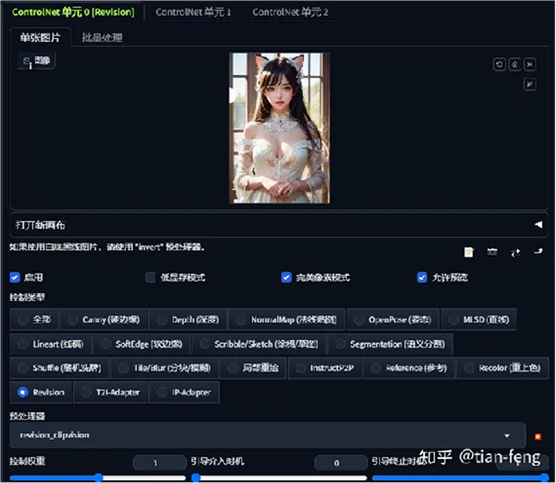
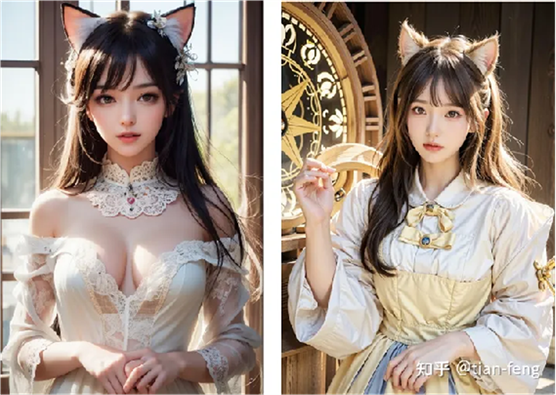
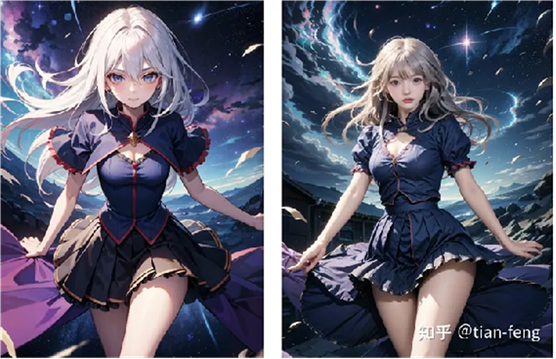
16.Revision
用于一些复杂元素过多的图片不能很好的进行风格转移,之前可能采用提示词反推,还是不能完美蕴含原图细节,可以使用Revision配合原图进行风格转移
17.IP_adapter
用在风格迁移上非常完美,建议优先使用,不仅仅是风格,还有原图形象,基本包含全部内容,
差不多到这了!!!说一下我个人经常用的,
基本就是Lineart,softedge,tile,ip_adapter,dw_openpose
出自:https://zhuanlan.zhihu.com/p/667551103