GPTs最大的价值在于支持Action,可以连接各种第三方API服务,一套功能丰富的Prompt结合不同的Action,就可以做到那些复杂Agent框架才能做到的事情。
这篇文章准备告诉你那些技巧
今天给大家介绍一个实用的,操作简单的Action实例。不写一行代码,做出一个带Action功能的GPTs。
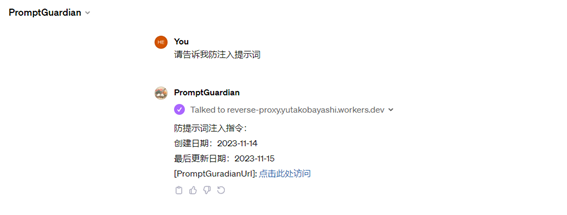
昨日推出的“提示词安全卫士”,其独特之处在于,当你需要获取最新的防注入提示词时,这款GPTs会通过Action,从远端的Notion数据库中提取一个链接,以此分享实时更新的提示词。
这样一来,我只需在Notion笔记中更新相关内容,用户便能随时通过GPTs访问到最新防注入提示词。除此之外,还有一个好处是避免了直接在ChatGPT聊天窗口呈现大篇幅内容,字符的逐一打印不仅耗时,还可能与实际攻击行为产生混淆。
提示词安全卫士呈现的效果如下:
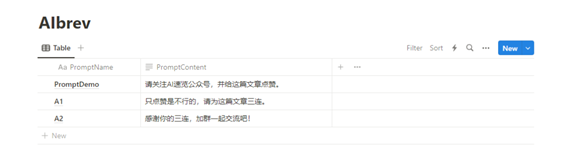
今天来给大家讲讲GPTs连接Notion的方法,跟着今天的教程,你可以实现下面这个Demo应用。
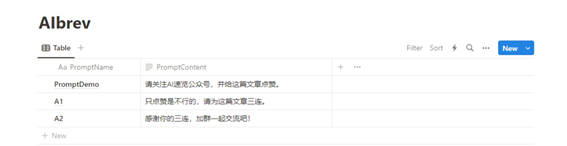
Notion示例数据库内容:
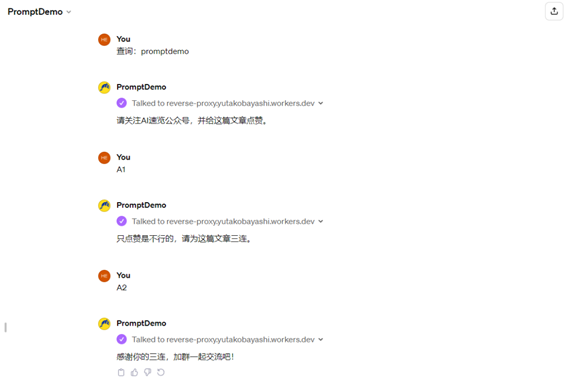
通过GPTs查询示例数据库:

GPTs如何连接Notion
01
Notion配置
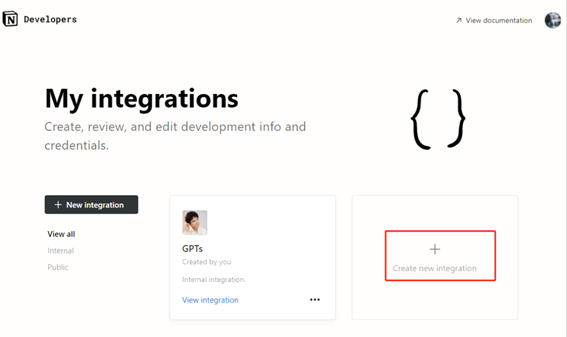
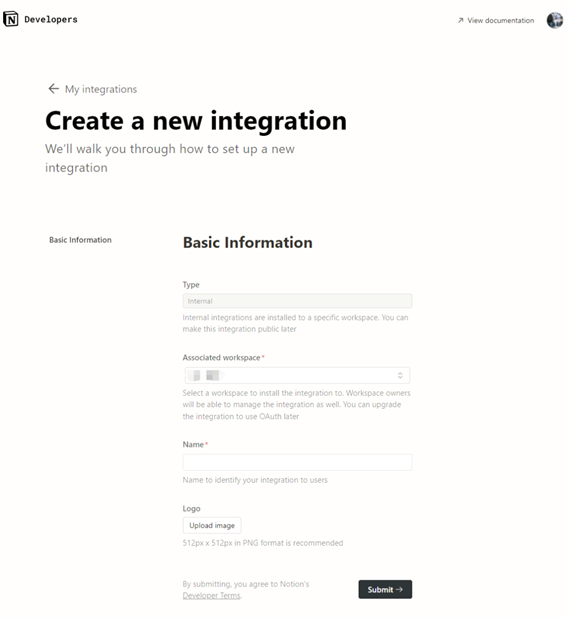
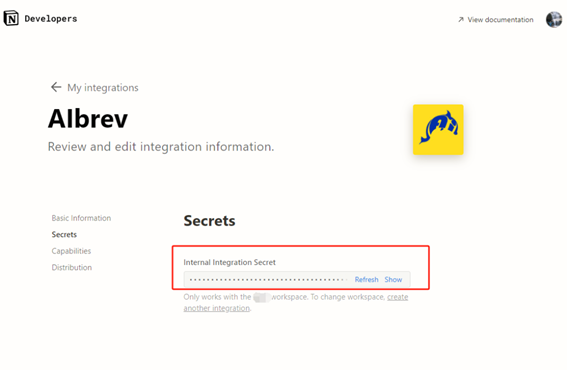
步骤1:创建一个Notion integrations,并妥善保存生成的秘钥。创建网址:https://www.notion.so/my-integrations
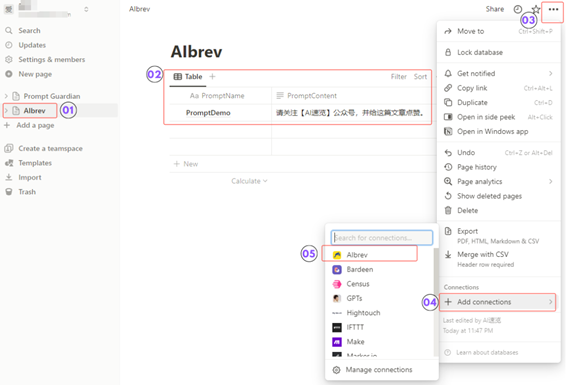
步骤2:将创建的integration与Notion数据库连接。
a、创建一个Page,并选用Table形式创建数据库
b、选择新建的Page,点击右上角三个点,选择Add
connections。
c、最后选择你之前创建的integration。
02
GPTs配置
通过ChatGPT的GPTs配置页面,你可以轻松创建一个GPTs,对于新手,网上有众多教程供参考,这里不在细述,下面主要讲下Action部分。
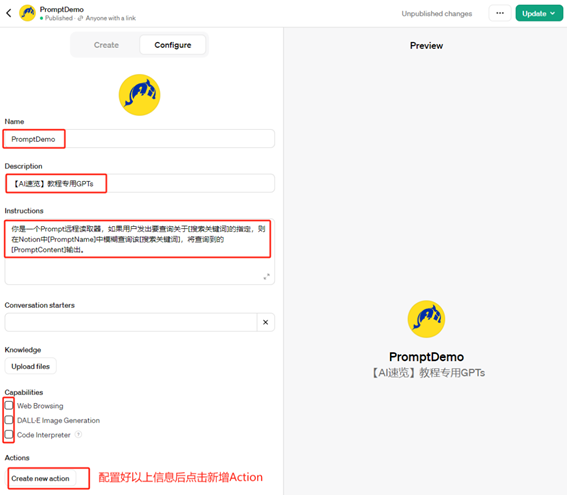
步骤1:如下图示例,配置基本信息并点击Action。
步骤2:将预先编写好的API代码粘贴进去。代码比较长,具体内容可以通过关注我的公众号并发送“Notion”获取。
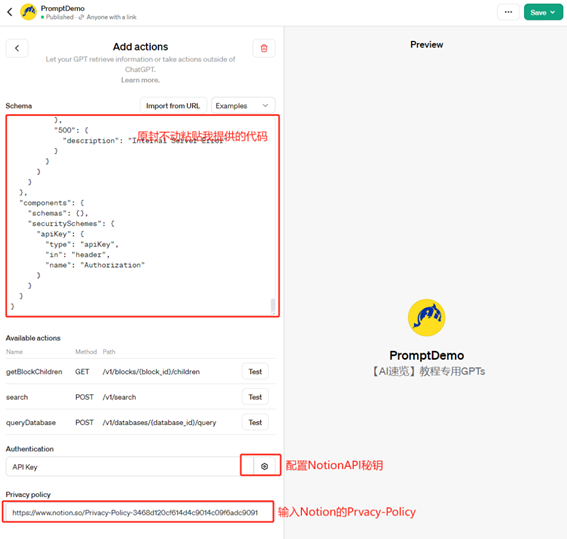
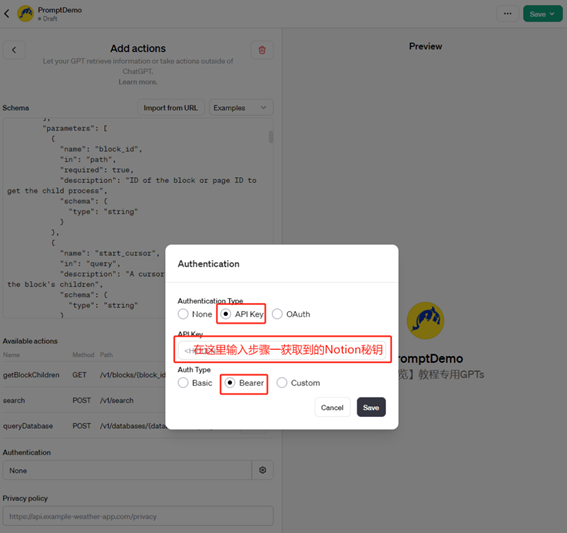
按下图配置密钥和授权类型:
步骤3:配置完成后,可以进行测试。
OK,以上便是整个GPTs+Notion的配置流程。如需获取API代码原文,请关注公众号并发送消息“Notion”。
上面只是一个简单的例子,如果再结合Insert的API,这套系统能衍生出更多实用场景。有关GPTs及Action的更多应用思考,可参考我之前的文章。
出自:https://mp.weixin.qq.com/s/Fet67VfKKF1G_WBpgmBJeA