ComfyUI是节点式编程的环境思路,安装后的默认启动示例,是一套生成图像所需的基础节点组合:

上图包含加载模型、设置关键词、设置图像大小、选择采样器、VAE解码、保存图片。
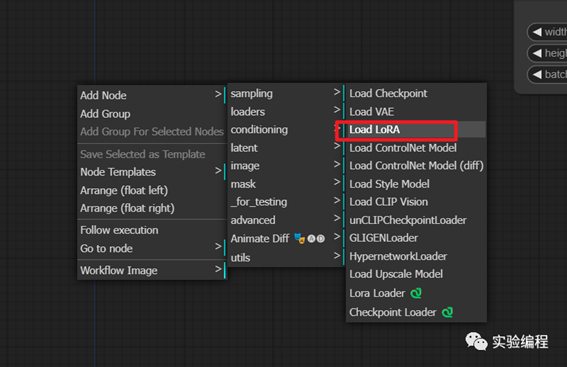
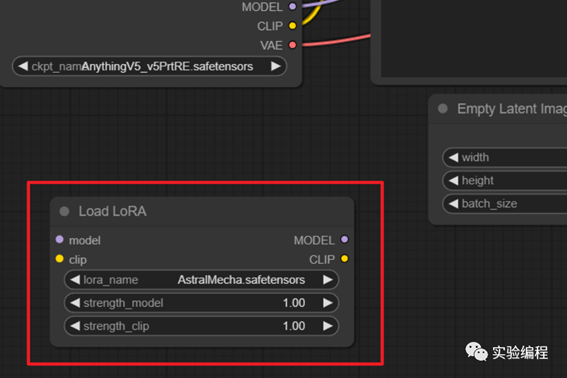
进一步丰富功能时,需要按需自主添加节点,例如加入LoRA:
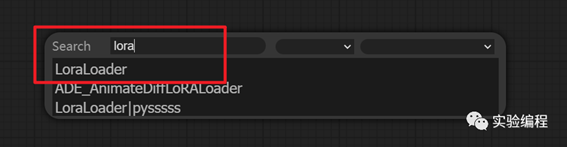
也可以使用节点搜索(双击空白处):
这与webui一上来就摆好盘的软件操作思路有所不同:
所以之前有webui使用经验后,相对熟悉常用功能,对使用ComfyUI是非常有帮助的。
相应的,ComfyUI的内置插件(或叫扩展 extension),目前也可能没有webui开箱时那么丰富。按需安装即可。
同webui一样,插件安装最常见两种方式:
·
单个插件手动安装;
·
·
使用插件管理器。
·
1. 单个插件手动安装
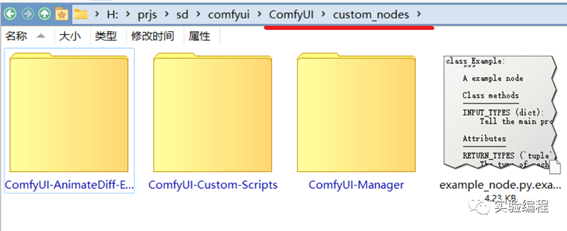
在ComfyUI中插件叫做custom node,所有的custom node都装在ComfyUI安装目录下的custom_nodes文件夹中:
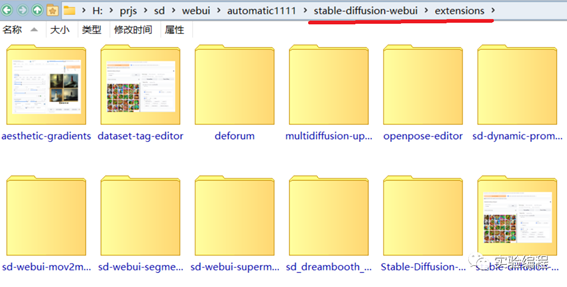
类比webui的extensions文件夹:
单个插件的安装与webui类似,把插件 git clone 到custom_nodes文件夹里即可。
例如安装ComfyUI
Manager这个插件: https://github.com/ltdrdata/ComfyUI-Manager
分三步:
1.命令行窗口中运行:cd
D:\COMFYUI路径XXXX\custom_nodes
2.继续运行:git
clone https://github.com/ltdrdata/ComfyUI-Manager.git
3.重启
ComfyUI
命令行的基本操作,参考第一节课。
示例图: 
2. 使用插件管理器
刚才安装的ComfyUI
Manager,实际上是一个插件及模型管理器,可以用它来浏览其他可选的插件列表并安装。
装好ComfyUI
Manager并重启后,会在右侧主菜单中出现Manager选项:
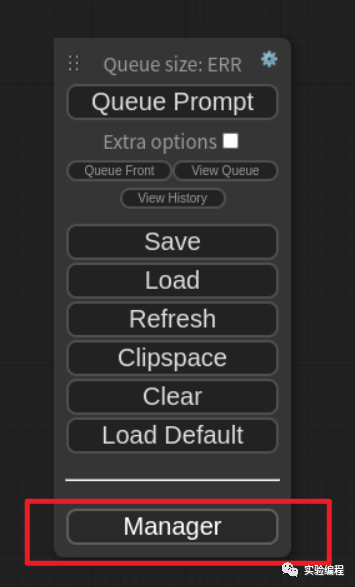
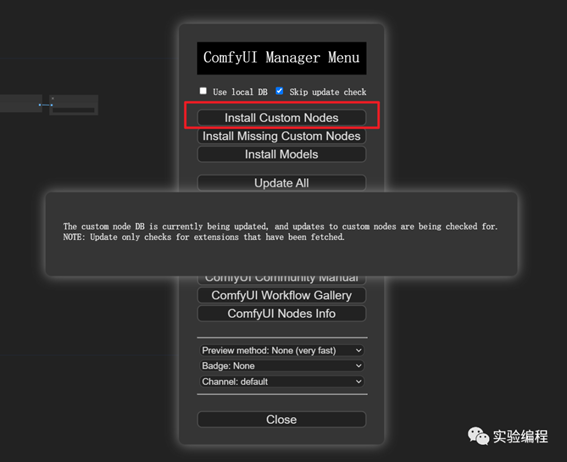
点击打开: 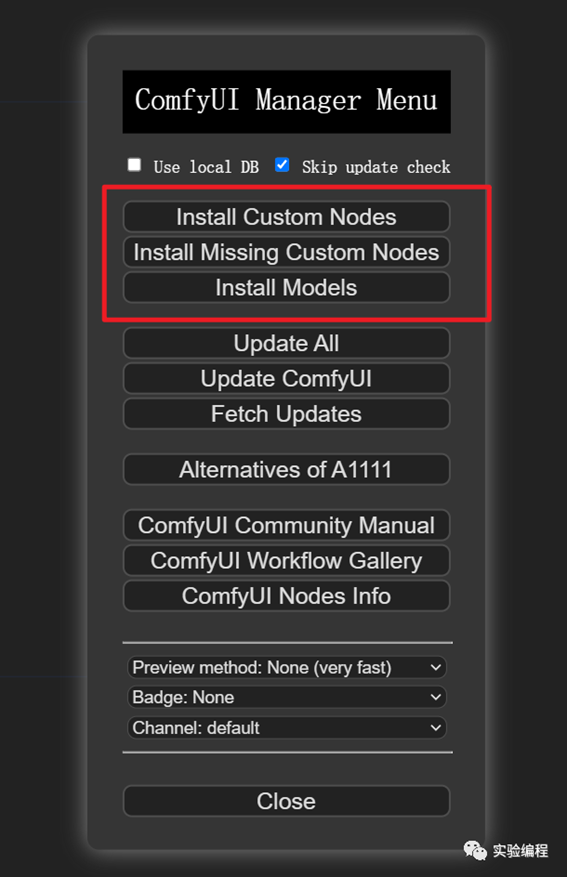
红框中的:
安装custom node(即插件)
安装缺失的custom node(稍后讲)
安装模型
Install
Custom Nodes
点击
Install Custom Nodes后,会去github上的插件列表里加载可用的插件:
命令行窗口里会显示细节:

这时候可能会出现经典的连接超时问题: 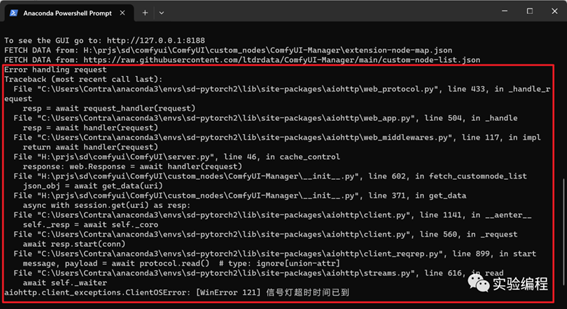
通过设置帆樯来解决。
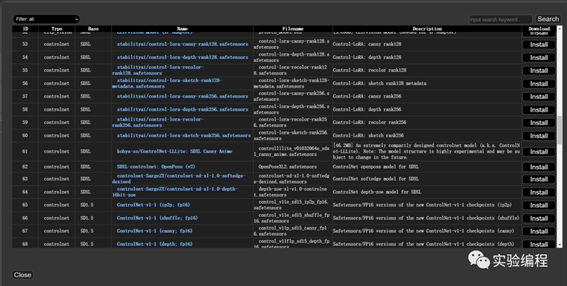
正常情况会弹出custom
node管理界面: 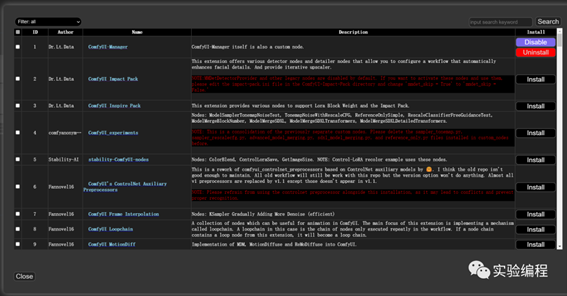
列出了插件作者、名称、简介。
最右侧的Install一栏,可以按照,禁用/启用,卸载。
红色部分是某些插件安装前的特殊要求,例如有的对python、cuda等版本有特定要求,会在这里进行提示。
按需安装即可,会比第一小节的单个插件手动安装方便一点。
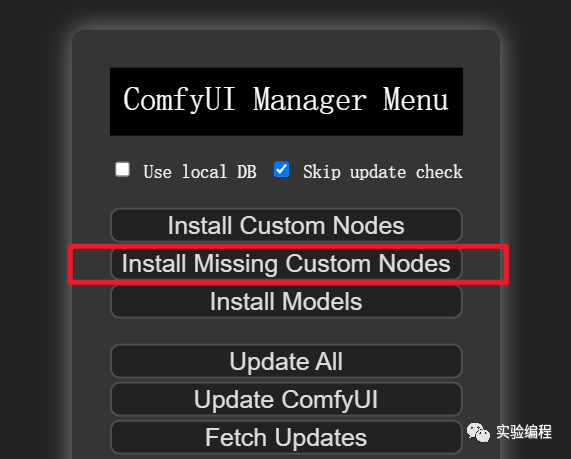
Install
Missing Custom Nodes
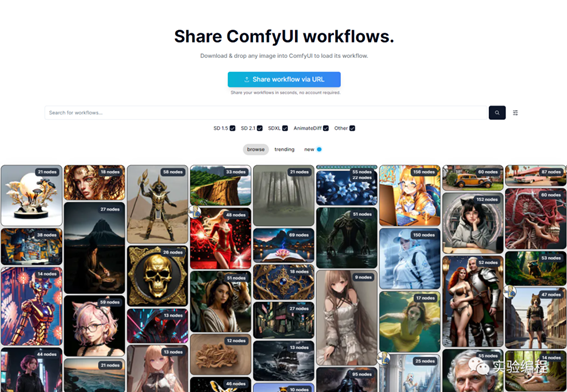
这是一个很实用的功能。上一节课讲了Workflow的使用方法,这个网站里有海量workflow参考:
https://comfyworkflows.com/
当你下载了一个workflow并加载后,如果发现有大量的红色节点:
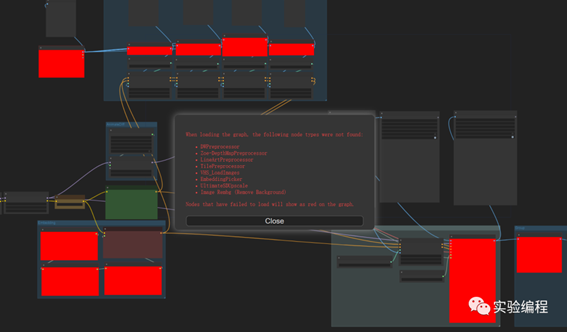
此时不要慌,真青年是不会慌的。
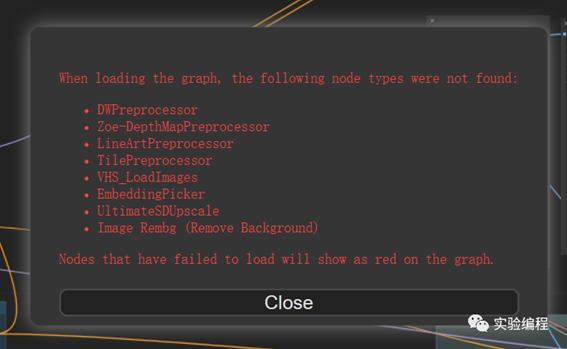
这是因为缺失了一些custom node,并且ComfyUI已经把缺的列出来了:
这时只需打开Manager,点击Install Missing Custom Nodes:
它会自动把这个workflow需要补充的插件摆好: 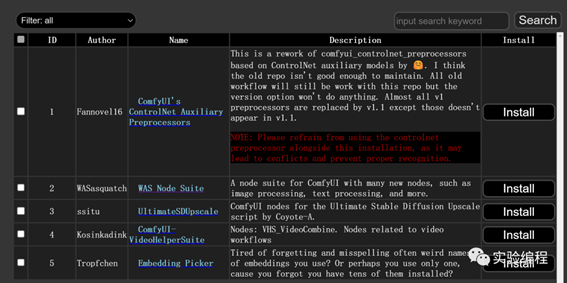
逐个安装即可。
Install
Models
ComfyUI
Manager除了管理插件,还能管理模型。 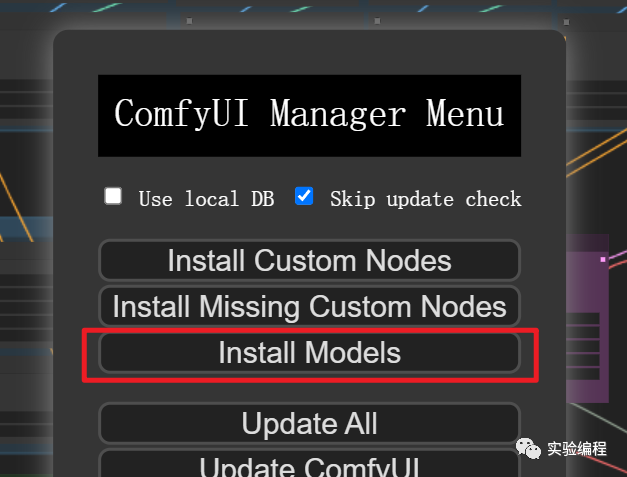
点击后会出现模型列表,包括大模型、ControNet、AnimateDiff等等等等,选择安装即可。
进阶:我没有使用这个插件来安装模型,而是手动下载,并且把所有模型都集中放在电脑另一处公共文件夹里,供ComfyUI、webui共享。详见我另一篇教程,让webui和ComfyUI共用一套模型文件:
一台电脑装多套Stable
Diffusion时共享模型文件的方法。
更新插件
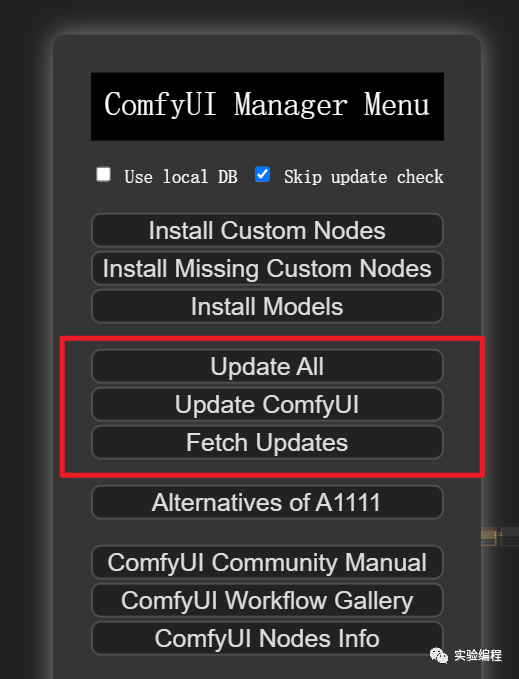
通过管理器来更新ComfyUI、更新插件。
简单不提。
出自:https://mp.weixin.qq.com/s/vKBZGWjvRH_KcO0Xafd5Lg