前情提要:上回书说到,我们下载并本地部署了ComfyUI的,利用简单的节点操作完成了我们的第一个工作流(【ComfyUI】本地部署ComfyUI上手指南,我就喜欢连连看),并且在这一集(【ComfyUI】Blender+Stable Diffusion!少年啊,这盛世如你所愿!(附中文汉化插件))中完成了对ComfyUI界面的汉化。今天,我们就要好好研究一下,如何在comfyUI中搭建SDXL的工作流,以及对比一下comfyUI和webUI在生成图片效率上的差别。
虽然现在已经有很多大佬分享了自己的工作流,但我还是建议大家能自己先手搓一下,一是为了搞懂SD的工作原理;二是因为自己连的工作流出图的那一刻,这个成就感是无与伦比的。就好像开汽车时,手动挡和自动挡的区别。

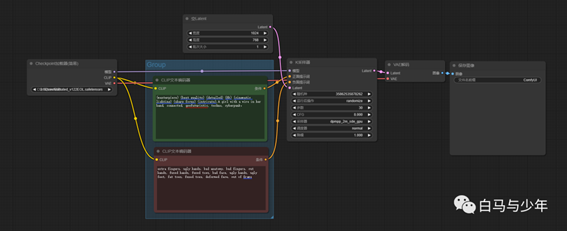
下图就是我们之前做好的第一个文生图工作流,我们今天就在这个基础上进行改进,创造一个适合SDXL的双模型工作流。
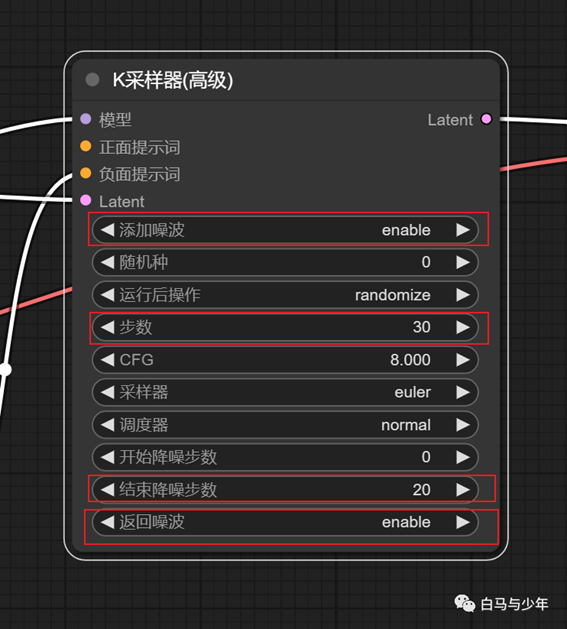
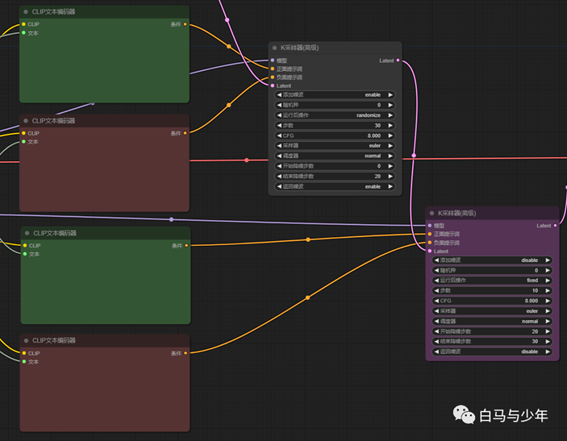
首先看到“K采样器”这里,我们点击“右键”-“新建节点”-“采样器”,可以看到有两个选项,今天我们要使用的是“K采样器(高级)”。
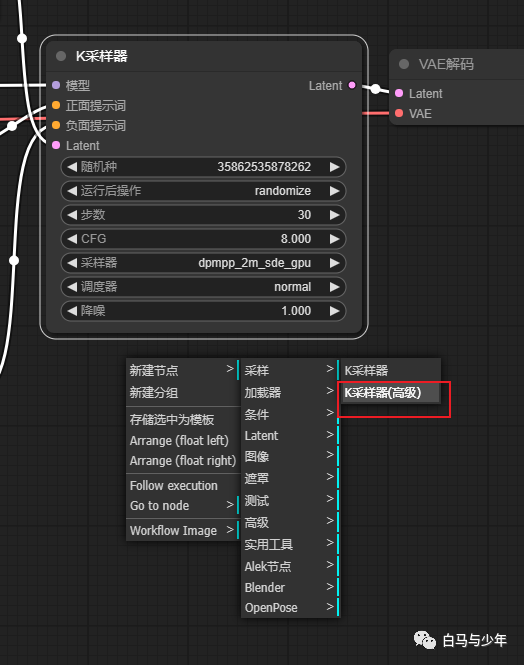
相比较而言,高级采样器会多一些调整参数,这些参数是我们今天要用到的。
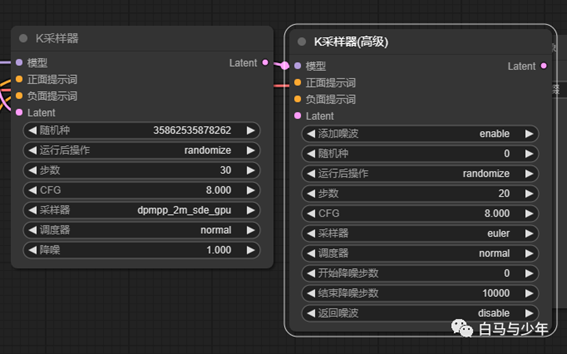
因为SDXL需要用到base和refiner两套模型,所以我们要将模型节点和采样器节点分别复制一份下来。
我们先来添加第一个base模型的采样器,参数设置如下:
·
添加噪波:enable。确保打开,添加噪声。
·
步数:30。迭代的总步数,比如我们设置为30步。
·
结束降噪步数:20。这个代表的意思就是,前面20步将采用base模型进行运算。
·
返回噪波:enable。这样就可以将剩下的噪声传递给下一个refiner模型。
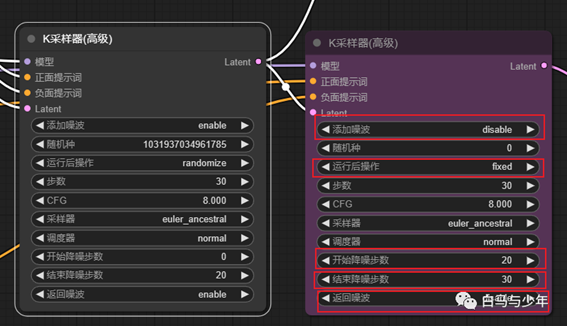
接着,将这个base的采样器传递到下一个refiner的采样器,参数设置如下:
·
添加噪波:disable。这里关闭,因为是继承上一个采样器,所以不需要再添加噪声。
·
运行后操作:fixed。相当于锁定随机种子的意思。
·
步数:30。迭代的总步数,和之前保持一致。
·
开始降噪步数:20。传递过来之后,是从第20步开始的。
·
结束降噪步数:30。这个数字也可以保持默认,反正就是运行到结束。
·
返回噪波:disable。不用返回了,到这一步已经结束了。
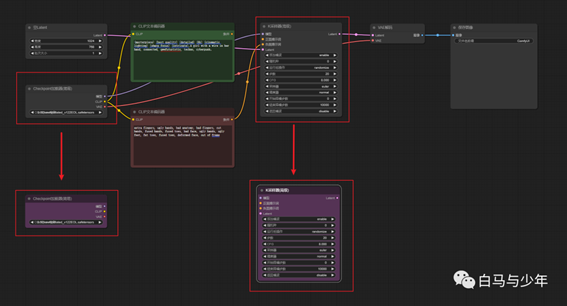
但是,现在问题来了。如果我将refiner的模型连上提示词的话,第一个base模型的链接就会断开,怎么样才能让两个模型同时起作用呢?
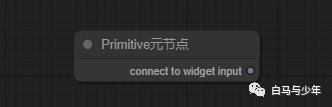
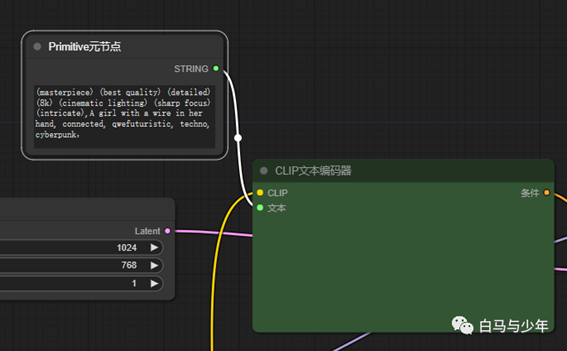
我们来加入一个新节点,右键点击-【新建节点】-【实用工具】-【Primitive元节点】。

这个节点很有意思,它连接谁,就会变成谁的属性。
在文本节点上单击右键,选择【转换文本为输入】。
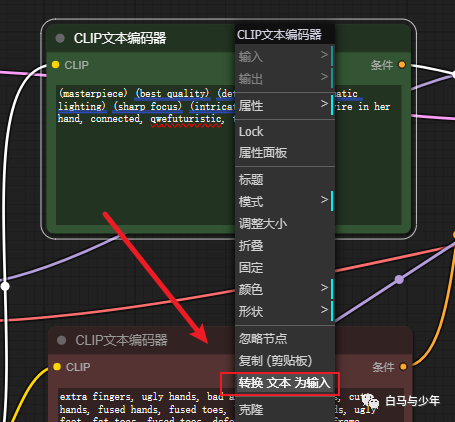
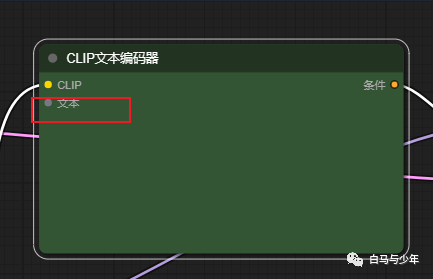
此时,文本节点上就多了一个文本的连接点。
将元节点与文本节点相连接,这时元节点就变成了正向提示词的输入框。
同理,可以将负向提示词框也用元节点代替。
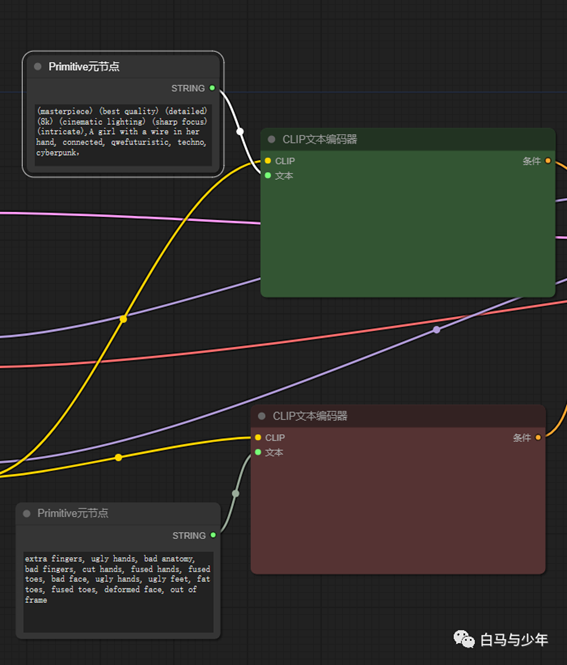
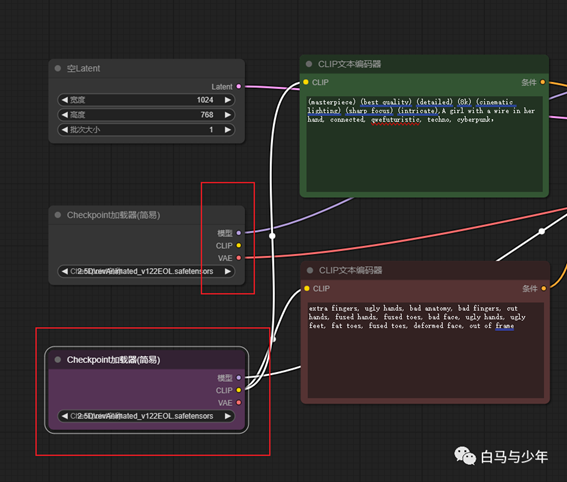
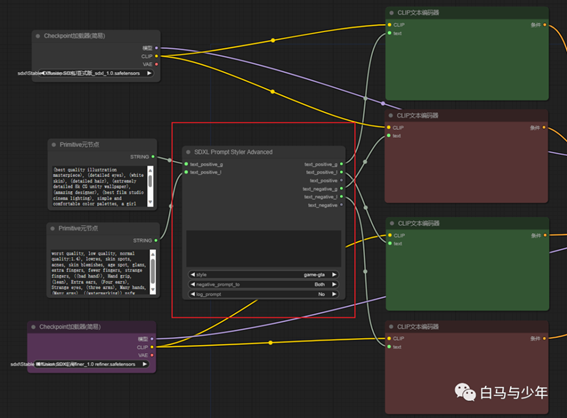
再复制出一套正负提示词节点,一套给base模型,一套给refiner模型。
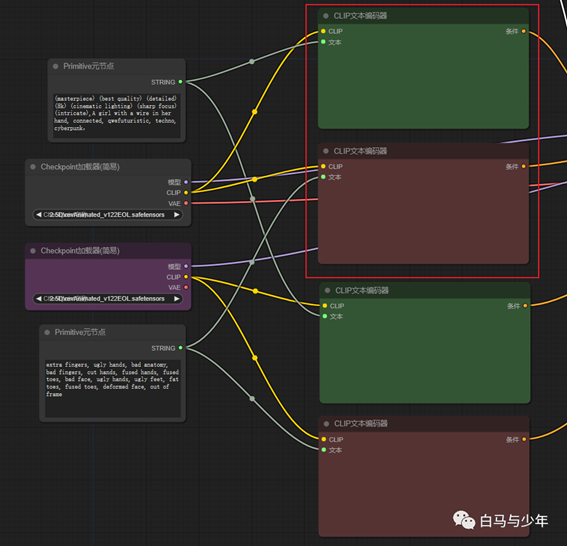
然后,base模型的那一套输出给第一个采样器节点,refiner模型的那一套输出给第二个采样器节点。
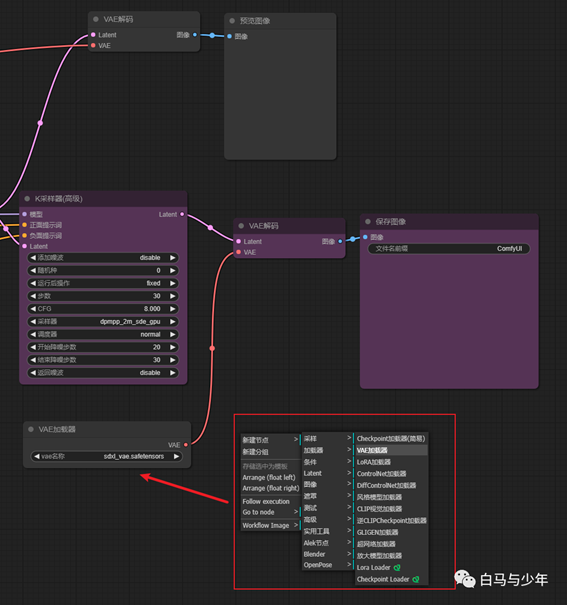
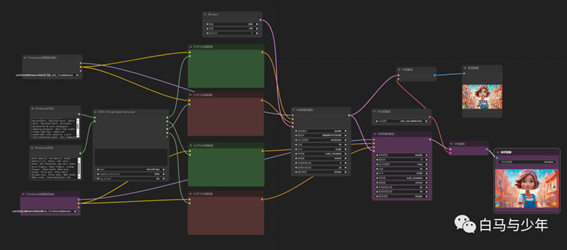
最后,我们能可以输出两个图像节点,第一个链接base模型的vae,可以设置为预览图像;第二个链接一个VAE加载器的节点,加载sdxl自带的vae,设置为保存图像,也就是我们最终输出的图像。
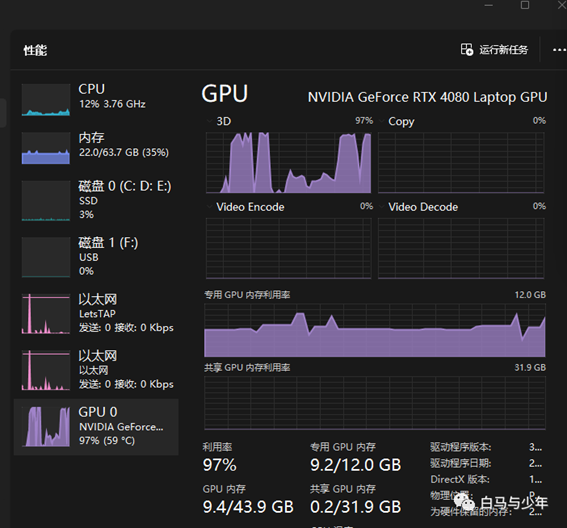
使用这个工作流我们来跑一张sdxl模型的图片,设置好两个模型和提示词,点击生成。
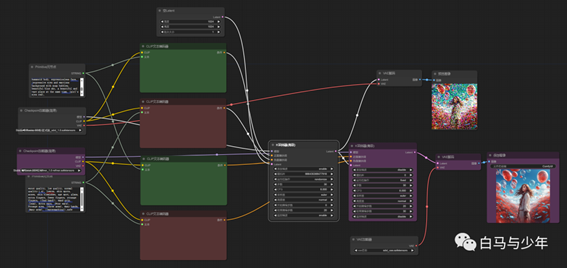
在生成过程中,显存的占用率为7-9GB。
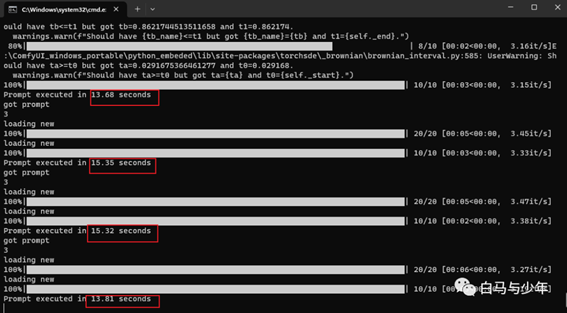
从后台可以看到,每一次生成的耗时在13-15s之间。
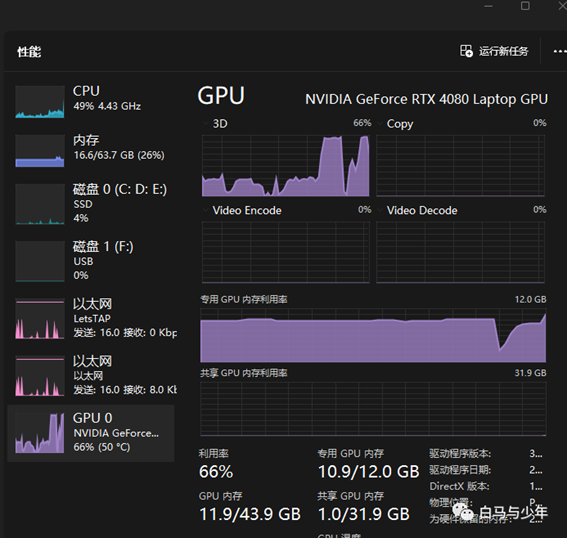
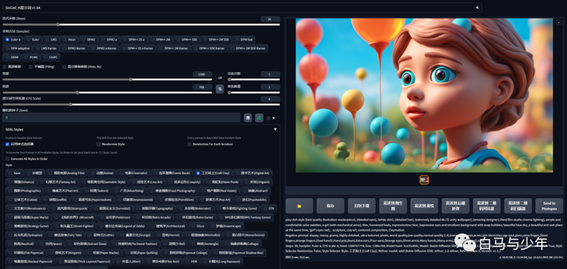
我使用同样的参数来测试一下webUI。
在生成过程中,显存的占用率为8-11GB。
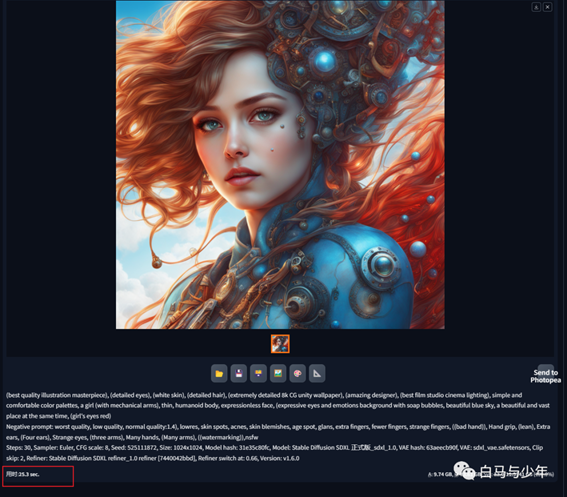
从后台可以看到,每一次生成的耗时在25s之间。
可以看出,comfyui在处理sdxl的模型是,确实要比webui更有效率一些。可能有些朋友已经被这个节点绕得有点晕了,但是还没结束。

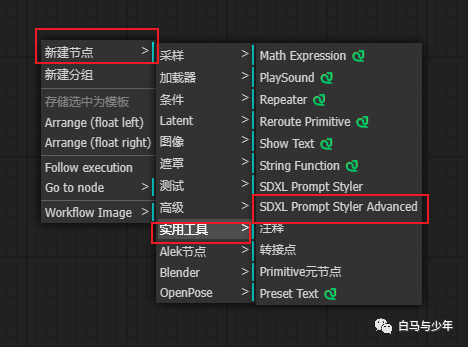
接下来,我们再试一试sdxl的风格控制,添加【新建节点】-【实用工具】-【SDXL Promot
Styler Advanced】节点。
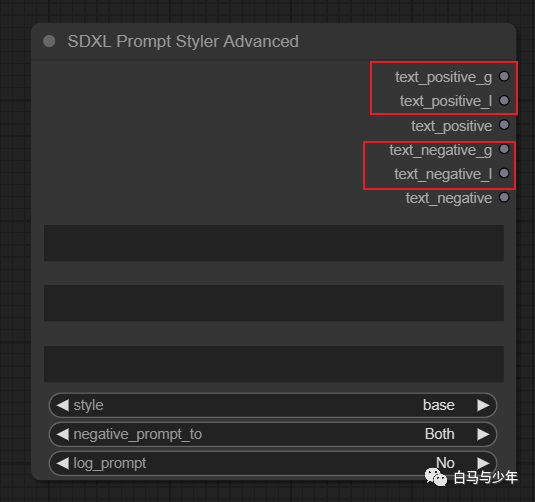
我们可以看到,在这个节点上有两套正负向提示词,分别对应着base和refiner。
点击右键,分别增加g和l作为输入点。
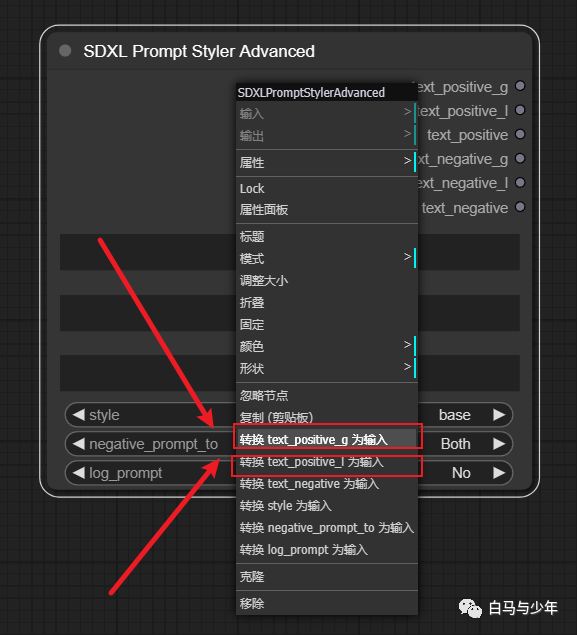
这样,我们就可以通过这一个节点将文本提示词分别赋予到base和refiner上,同时也把风格的切换加进了工作流当中。
点击这里的【style】就可以看到各种风格了,不过都是英文的。
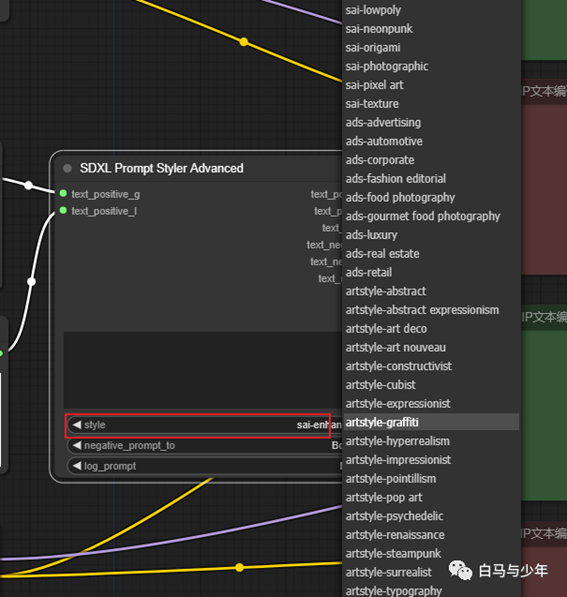
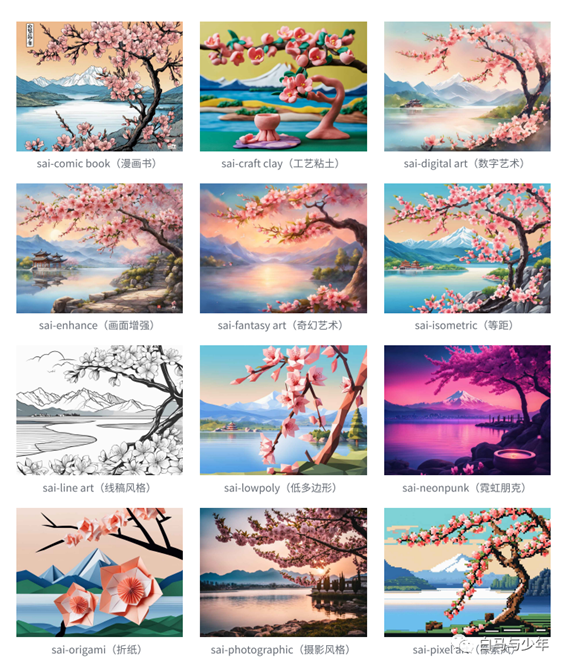
我这里有一份中英文对照的表,大家也可以参考一下,一共105种风格,我会把它放在网盘里。
选一个黏土风格进行测试,尺寸设置为1280*768,用时15.11。

同样的参数,我在webui里跑了一下,用时3分33秒。
总结
通过今天的搭建,我们已经掌握了sdxl在comfyui中的工作流程,下次再要进行生图,只需要将这个工作流打开就可以直接运行了。效率高、生图快,可能这就是comfyui最大的优势点吧。
出自:https://mp.weixin.qq.com/s/M-1WF5hvP1psfJti4MIB8w